Archive for the ‘Ethnic Foods’ Category

Costa Vida Sweet Pork
Sunday, June 7th, 2009

This is THE recipe. The recipe for which this blog was primarily created that is. I can’t claim that it is an exact replica of Costa Vida’s sweet pork though. But its close. Very close.

Some of you may remember (from my personal blog) that ‘taste off’ I did last year. It was sort of a personal goal to try and perfect the recipe for Costa Vida’s sweet pork. I made it. I changed it. I made it again. I changed it. I posted about it. And so on… In the midst of it all I received feedback from both personal acquaintances who actually tasted it, and random strangers that found my blog through online searches.

One of the more interesting comments I received was from a real life Costa Vida chef from Maine. He gave me hints. Helpful hints. I tried his suggestions, and re-tried them, and re-tried them. At first I had too much sugar, then too many serano peppers. I went back and forth a bit between too sweet and too spicy. In the end I found a recipe that closely emulates Costa Vida’s Sweet Pork. I’m certain its not exact, but its closer. A lot closer. And who knows maybe the recipe will evolve even further through comments and opinions I receive here. Perhaps another Costa Vida insider can shed some more light on my recipe – any takers?

My original recipe involved only 4 ingredients – pork, coke, brown sugar, and salsa. It was tasty, but it wasn’t entirely authentic. Since then, my recipe has evolved to the following:

Costa Vida Sweet Pork (knock-off recipe)

Pork Roast (4-5 lbs), thawed if frozen
3 c. Coke
1 can tomato sauce
1/2 c. sugar
2 Tbsp. (heaping) brown sugar
1 Tbsp. cayenne pepper
1/2 tsp. powdered garlic
2 cloves garlic, minced
3 large carrots, peeled and grated
1 (smallish) serrano pepper, seeded and diced
1 medium yellow onion, chopped

Cut away any obvious fat portions from the roast. Place all ingredients in a crock pot and cook on high for 6-7 hours.

Remove pork to cutting board.

Add an additional 1/2 c. granulated sugar and 1 cup Coke to the liquid in the crock pot. Stir.

Shred the pork, removing excess fat and bones, and add back to the crock pot. Stir.

Reduce to low and cook an additional 3 hours.

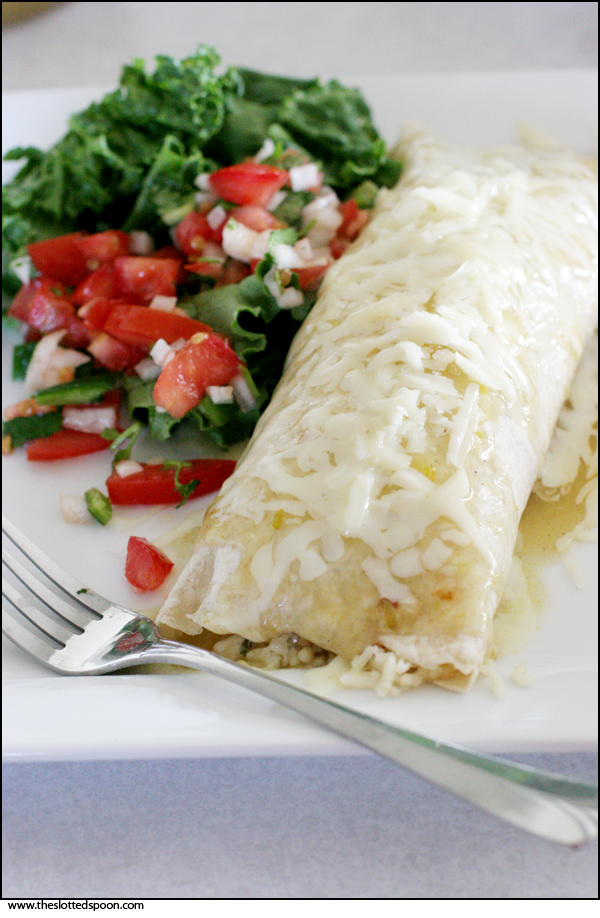
Serve pork in Costa Vida style burritos, or otherwise as desired.

*Cover remaining pork and refrigerate for up to one week. It can also be placed in freezer safe bags and frozen for use up to 3+ months later.

I should probably mention that I usually get up around 6 am when I make this. By the time I get all the vegetables cut up and everything added to the pot its about 7:00. It cooks until 1:00 or so. By about 2:00 the pork is shredded and the final ingredients added. Pork is done around 5:00 and ready to assemble into burritos, salad, nachos, etc…

It pretty much takes all day. Thankfully the crock is doing the majority of the work.

——————–

How about a few more pictures…

Adding the Coke:

And the veggies/spices:
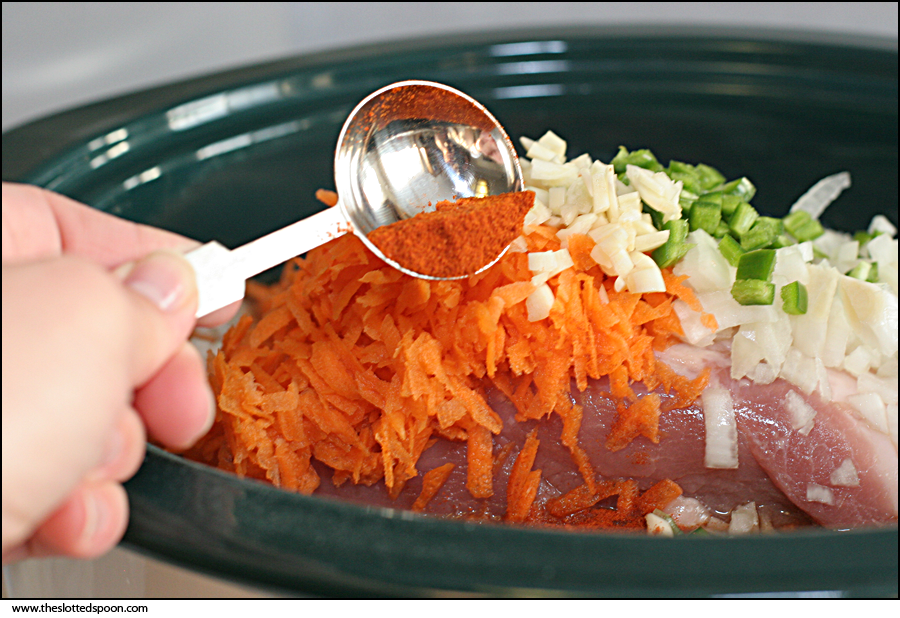
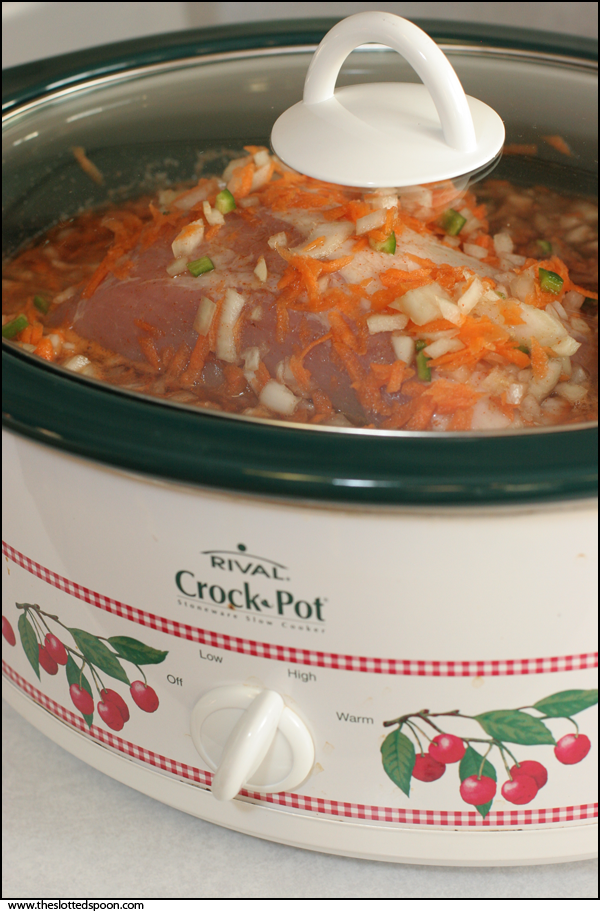
In the crock, ready to cook!
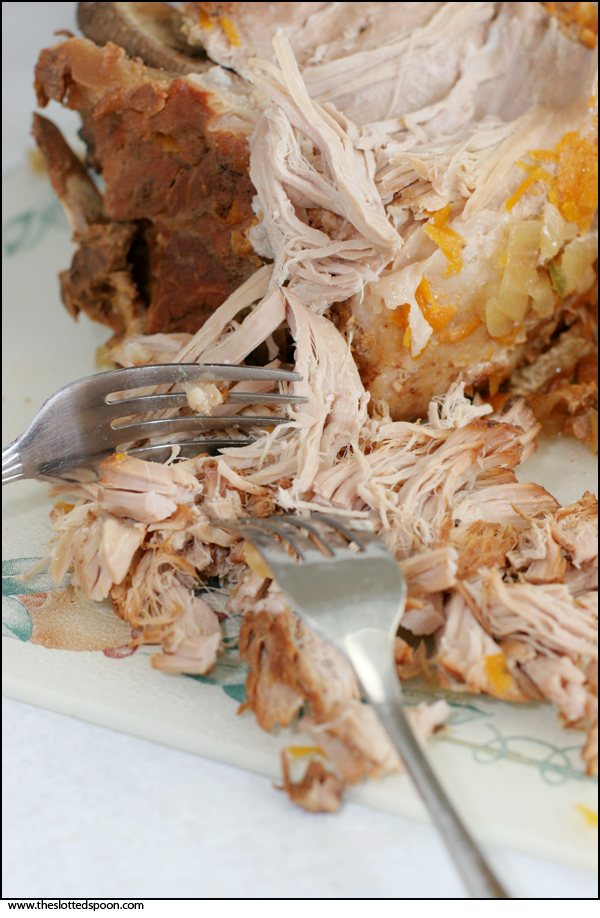
Shredding the meat:
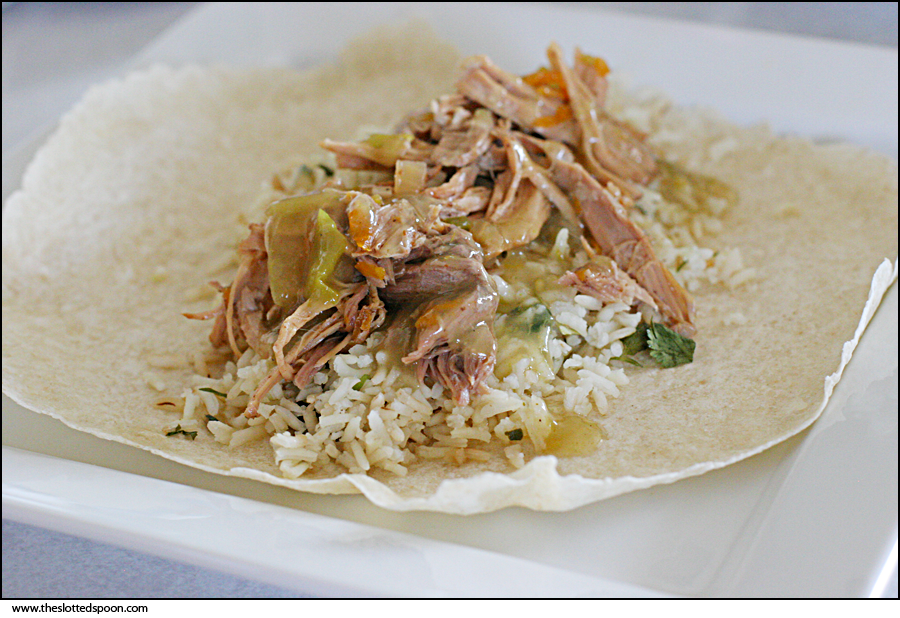
All done and on the burrito. Almost ready to wrap!
——————–

For those of you that missed the excitement last year I’ll give you a bit of a rundown of things that have transpired [Excerpts straight from my other blog].

Please note: All of the following information is from a year or more ago, and is pretty outdated. It serves only to give a history of this process and provide a point of reference for the recipe as it stands today, on this blog. If you don’t want to read all of this then don’t. But its here for all those that are curious. Note also that this is in no way inclusive of all the sweet pork related posts from last year. It also does not include any previous versions of the recipe.

How it all started…

A couple of weeks ago, we were sitting at our kitchen table dining on our Costa Vida menu item of choice, when Dave asked, “Do you think you could make these?” I told him that I imagine somewhere on the internet someone has posted a recipe we could try.

The contest/choosing the panel…

So, just for the fun of it (Not because I promise to BE Costa Vida), we are going to hold a taste-off. The event will be held on Friday, March 21st, 2008 at our home – In honor of my Costa-Vida-lovin’ husband’s birthday. The idea is that we will purchase a Costa Vida Sweet Pork burrito, and make some ourselves. 10 tasters will be chosen, blindfolded, and given samples of both burritos. They will be asked to state which they believe to be authentic Costa Vida, as well as which taste they prefer. If you are interested in being a taster, please tell us in 50 words or less why you should be chosen.

Disclaimer: This contest/event is just for fun. It is in no way endorsed or affiliated with Costa Vida. Any resemblance to food items or ingredients used in actual restaurant menu items is strictly coincidental. As stated above, the recipes used were derived from various sources – including the taste buds of one Costa Vida addict.

The finer print:

Sweet Pork Burrito Taste-Off
Friday, March 21st 6:00 p.m.

Entry Rules/Details:

  1. 10 tasters will be chosen based on responses posted to the comments section of this post.
  2. Entrants must, in 50 words or less, describe their qualifications for being a tester (E.g. I practically live at Costa Vida, I look really good in a blindfold, or my nickname is ’sweet pork’)
  3. All entries must be posted as comments to this post. No other form of submission will be considered.
  4. Tasters will be chosen as individuals. Please do not submit entries as couples or families. Separate entries are needed for each person.
  5. Entrants must actually know us on some level. (Random men named Fred living in St. Paul may be disqualified.)
  6. Tasters must be available (in Logan) on the evening of Friday March 21st to participate in the event.
  7. Tasters must be willing to have their photograph taken (most likely while blindfolded), and posted on this blog.
  8. All entries must be received by Monday, March 10th at 11:59 p.m.
  9. Tasters will be chosen (and posted here) on the morning of Wednesday, March 12th.
  10. All tasters will be fed a full “Costa Tina” burrito dinner that evening.

The purpose of this event is to have fun, eat good food, and laugh out loud. The purpose of the contest portion of this event is to allow each of you to exercise your inner creative selfs, to give us some fun stuff to read, and because – well, just because its funny.

The responsibility of the tasters panel:

The responsibility of this panel will be to assess the authenticity of the sweet pork, to compare flavors, and to blindly choose their burrito of choice. They were chosen based on entries submitted to the Sweet Pork Burrito (tasters needed) post. Each member of the tasters panel will be blindfolded, laughed at for being blindfolded, and given a variety of items to taste. Their responses will be recorded, their pictures will be taken, and both will be posted here for your assessment (and viewing enjoyment).

The results from the Sweet Pork Party:

Here’s how it all played out:
Each person was blindfolded and given two sample cups of each: pork, rice, and burrito.
They were asked to 1) try to identify which was from Costa Vida, and 2) to state which flavor they preferred.

Responses were verbally given and recorded. Participants did not necessarily receive samples in the same order.

The following table outlines the responses:

Pork (identify) Pork (taste) Rice (identify) Rice (taste) Burrito (identify) Burrito (taste)
Shauntae Yes CV Yes CV Yes T
Emily Yes CV Yes CV Yes T
Michelle Yes CV Yes CV Yes T
Raelynn Yes CV Yes CV Yes T
Sandra Yes CV Yes CV Yes T
Jared Yes CV Yes CV Yes T
Joel Yes T Yes T Yes T
Chris Yes T Yes CV No CV
Dan Yes CV Yes T No CV
Dave Yes CV Yes T Yes T

As you can see, everyone correctly identified the Costa Vida pork and rice when sampled separately. 8 of 10 identified the finished Costa Vida burrito.

8 of 10 preferred Costa Vida’s Pork and
7 of 10 preferred Costa Vida’s Rice
but only 2 of 10 preferred Costa Vida’s complete burrito

I also thought it was interesting that all of the girls (and Jared) voted the exact same way. Hm.

The general consensus was that Costa Vida’s Sweet Pork was sweeter and juicer. It actually had a noticeably deeper color too it, and a thicker sauce as well.
My rice was heavier on the lime. And some say it had a bit too much cilantro as well

And then…

Not too long afterward, I got a comment on my blog that read:

“Your recipe is far off. I personally work in the kitchen and that recipe for pork is permantly scarred in my head. Just wondering which resturant you go to. I work in Maine. Email me back I might be able to give hints.”

My initial thoughts were “wow” and “is this for real?” But it didn’t take long for me to e-mail back. My new chef friend and I e-mailed back and forth several times, and over the course of the last month or so, I’ve tried the recipe 3 more times.

I learned that I should try adding carrots and serrano peppers. And white sugar instead of brown. And cook the meat in the coke mixture from the beginning instead of cooking it in water, shredding it, and then adding the coke mixture. I learned a lot. Here are a few of the hints I received:

“Try some coke, sugar, serrano peppers, and a blend of simple spices, cyanne. Also must have onions and carrots. Then simmer for several hours”

“One of the keys is to blend the sauce really well and then add that and some more sugar”

“In the crock at about 6:30am on low is what I found to work good”

Tags: , , , , ,

Tomatillo Ranch Dressing

Sunday, May 24th, 2009

Last year I spent some time trying to figure out the recipe for Costa Vida’s Sweet Pork. I made it so many times that I quickly became sick of sweet pork. My husband and I even held a taste-off. And I documented the whole thing on my personal blog. Things got a little crazy after that. I started getting e-mails and comments from people looking for the recipe, those that had tried it, and from a guy that actually WORKS for Costa Vida as a cook. I got a lot of interesting feedback, and some pretty good hints as to what my recipe might be lacking.

Today, more than I year later, I find myself still getting e-mail inquiries, and my past blog entries are at the top of google search results for Costa Vida sweet pork recipes.

The only real problem, is that after all that mayhem last year, I still never posted my final recipe for sweet pork. And I’ve made some modifications to the Cilantro Lime Rice and this Tomatillo Ranch Dressing as well. Part of the purpose of setting up this blog was to have a final resting place for all these Costa Vida recipe knock-offs. So about a week ago, I rolled up my sleeves and got cooking again. This time photographing each step of the process. Over the next couple of weeks I’ll post all of the recipes here.

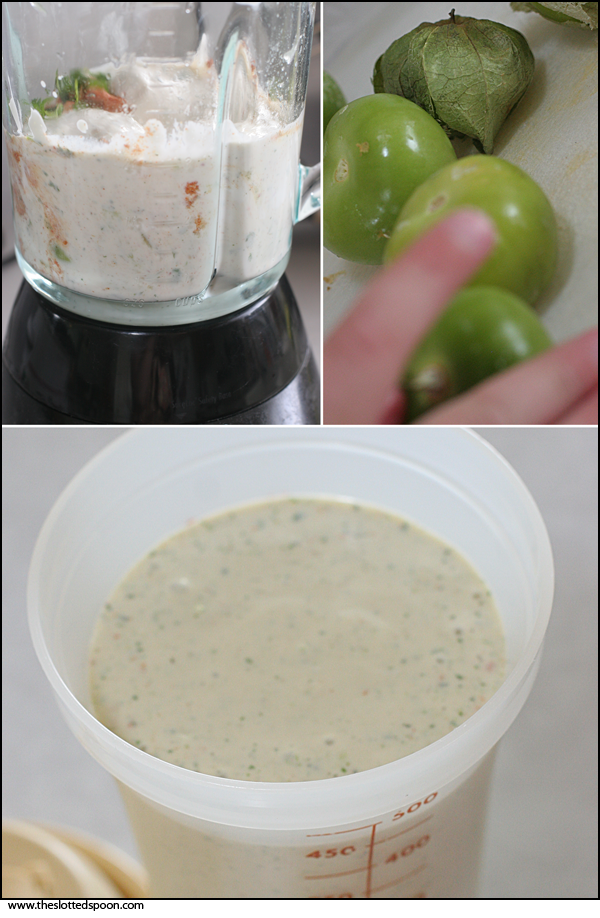
Today, we’ll start with the Tomatillo Ranch Salad Dressing.
Its thick and Creamy. Its flavorful. Its fabulous.

And you don’t just have to use it on the sweet pork salads. You can use it on any salad. Or as a vegetable/chip dip.
(Or you can pour the leftovers over some cooked pasta and add a little meat and cheese, like I did)

Don’t be tempted to use canned tomatillos either. You simply have to use the fresh kind.

Here’s the recipe. You can thank me later.

Tomatillo Ranch Salad Dressing

– 7-8 tomatillos, husked and cut in half
– 1 cup sour cream
– 1 envelope Ranch Salad Dressing Mix (any brand)
– 1⁄2 envelope (Hidden Valley) Fiesta Ranch Salad Dressing
– 1 clove garlic, minced
– Juice from 2 freshly squeezed limes
– 2 Tbsp. milk
– 1⁄3 cup freshly chopped cilantro

Combine all ingredients in a blender. Blend until smooth.

(Store in refrigerator 5-7 days)

Easy Peasy! And super yummy.

Chinese Chicken Salad

Wednesday, April 22nd, 2009

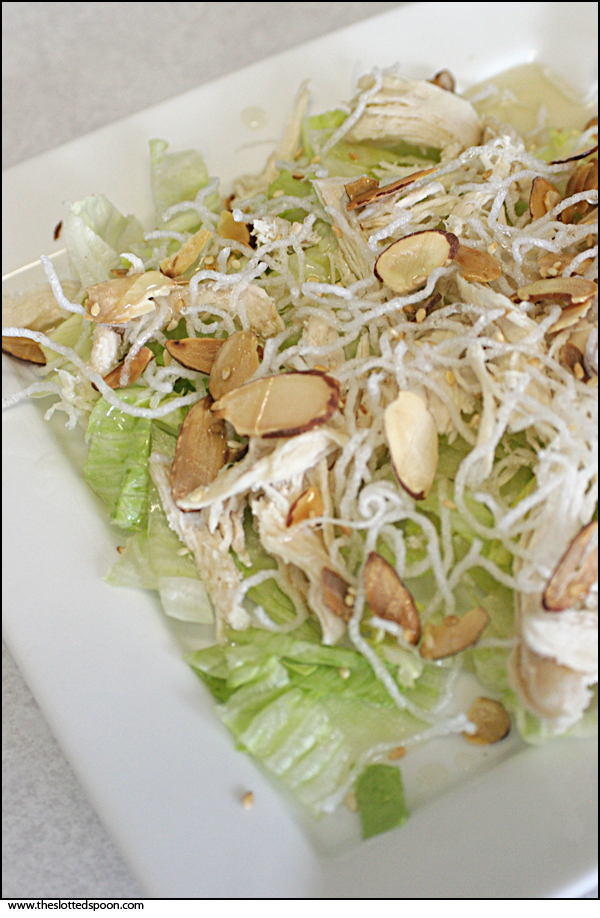
Chinese Chicken Salad

Chinese Chicken Salad

My cousin came up to visit me a couple of weeks ago, and we made this super yummy Chinese Chicken Salad. It kind of has some odd ingredients, but its pretty easy to make – and one batch goes a long way! My mom used to make it years ago, and I almost forgot about it until I had some at a baby shower recently.

Its not really ‘picky husband’ food. Or little kid food.

Its more like girlfriend, or relief society gathering food. Or bridal/baby shower food.

My cousin and I sure enjoyed it!

I could literally just eat and eat this… wait, that’s exactly what I did.

At any rate, its worth trying!

The following recipe is somewhat approximate. The amount of almonds, onions, etc… is really up to the individual.

Chinese Chicken Salad

2 chicken breasts
1 head iceberg lettuce
sliced almonds (about 1 cup)
green onions (about 5-6)
sesame seeds (about 2 Tbsp)
Maifun rice sticks
oil for frying
.
4 Tbsp. apple cider vinegar
8 Tbsp. sugar
1 T. sesame oil
Salt/pepper to taste

Cook Chicken breasts (bake or boil). Cool, and shred – removing any bones in the process. Set Aside.

Heat oil to 400 degrees. Should be at least a couple of inches deep.

Wash lettuce and cut into thick strips, or just break apart with hands.

Slice green onions

Toast Sesame seeds in a frying pan for a couple of minutes until lightly browned or until they start to pop.

Toast Almonds on a try in a 350 degree oven, until browned. It should only take a couple of minutes. Stir at least once in the process.

Crush Maifun noodles in the package and drop in small amounts into the hot oil. Noodles should immediately expand. Remove them with a fork and drain on a paper towel.
Note: If the oil isn’t hot enough, the noodles won’t expand. It really does need to be at 400 degrees.


Prepare the Dressing:

Combine apple cider vinegar, sugar, sesame oil in a bowl, bottle, or jar. Stir to combine. Add salt and pepper to taste.


Building the salad:

Lettuce first, then chicken. Followed by Maifun noodles, toasted almonds, and green onions.

Pour on dressing and top with toasted sesame seeds.

Note: This salad will easily feed a dozen people.

Also note: The image above lacks green onions. I forgot to add them before I took the picture.

Tags: , , , , ,

Sushi 101: Roll, Baby, Roll

Friday, April 10th, 2009

To make a Sushi roll, you need to start with Sushi Rice. Regular white rice won’t work, so please, use the Sushi Rice. You’ll also need a bamboo rolling mat and some Nori (seaweed). Beyond that, its kinda of up to you! Get creative.

A couple of tips when choosing Nori. It is generally said that the darker the color the milder the flavor. So if you’re not really into the seaweed flavor – go as dark as you can. You can also get Nori that is toasted or roasted – again, its a little different flavor. You may want to try several kinds and see what you like. I used a Yaki Nori that was toasted. My local oriental store sold it in packages containing 10 or 50 sheets. You’ve got options!

Next… the mat. Obviously the bamboo mat and the sushi rice may not always get along well. So, unless you want to clean sticky rice from the slants on your mat… you may want to follow some advice I received and cover your mat with plastic wrap before you work. You’ll need to use a cling wrap that adheres to itself well, and you’ll want to cover the entire mat (all the way around). One long piece should do, just make sure it overlaps itself as it comes back around. Note: a bamboo mat is pictured above underneath the trays.

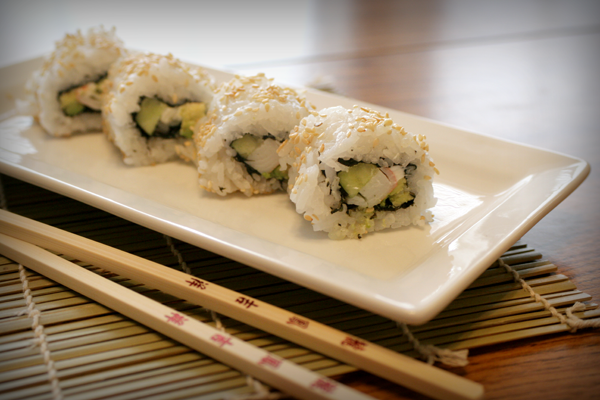
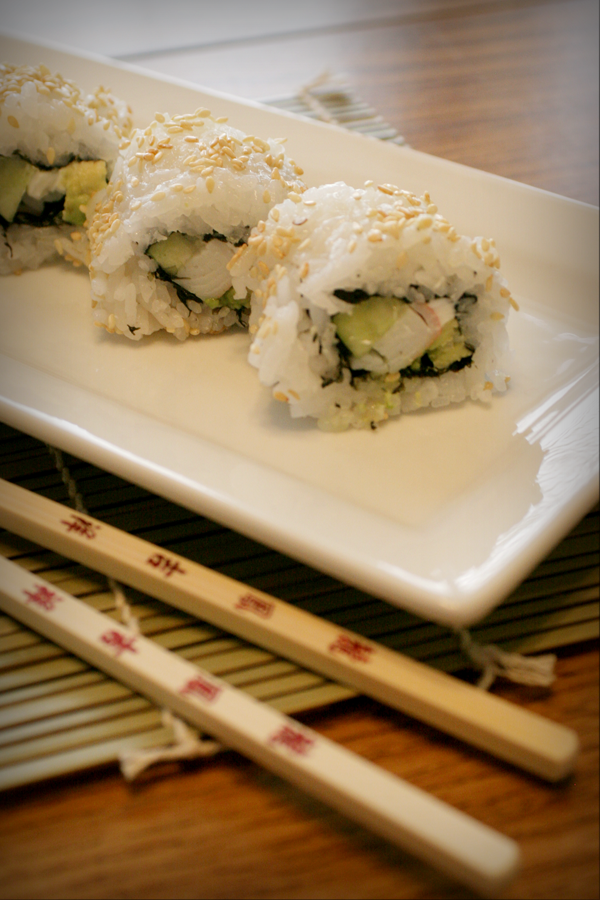
Lastly, sushi is traditionally eaten whole and inserted into the mouth with the thumb and index finger. It is not considered appropriate to bite pieces from the sushi either – you should eat each piece whole. And I’m pretty sure its just an American thing to use chopsticks to eat sushi (correct me if I’m wrong). They were photographed above for aesthetic purposes.

Now that we’ve covered the basics…

Let’s talk California Roll.

California Roll

-Sushi Rice
-Nori
-Cucumber
-Imitation Crab, in sticks
-Avocado (optional, but common/recommended)
-Cream Cheese (optional)
-Sesame Seeds, toasted

Begin with your (plastic wrap covered) bamboo mat placed on the table or counter in front of you with the bamboo slats aligned horizontally with your body, so you’ll be able to roll the sushi away from you.

Get a sheet of Nori and carefully fold it in half creasing on the seam. It should break easily. Place the half sheet on the bamboo mat so the long side aligned horizontally to your body. In other words the the long side of the Nori should be parallel to the slants on the bamboo mat. The shiny side should be against the mat.

Get a small handful of the sushi rice and gently press it on to the Nori until you’ve covered the entire surface. It need only be about 1/4″ thick. Remember, press gently – no need to smash the life out of the rice.

Now, since California Roll has the rice on the outside, carefully turn over the rice-covered Nori.

Cut your Cucumber, Avacado, and Crab into long strips. Place one strip of each lengthwise across the center of the Nori.

If you are using cream cheese, get a small amount in your fingertips and gently shape into into a long strip, and place it in the center with the other items.

Don’t overfill. You have to be able to roll it up.

Carefully lift the edge of the bamboo mat closest to you until the sushi begins to roll on top of itself – roll away from you. Use a lift, roll, and release motion to complete your roll. Press gently on the mat as you go to seal it all together. Again, don’t squeeze.

When your roll is nicely sealed, carefully lift it from the bamboo mat and roll in toasted sesame seeds.

Transfer to a cutting board and use a REALLY SHARP knife to slice it. (Note: There are actual ‘sushi knives’ available)

Enjoy with wasabi, ginger, soy sauce, or just as they are.

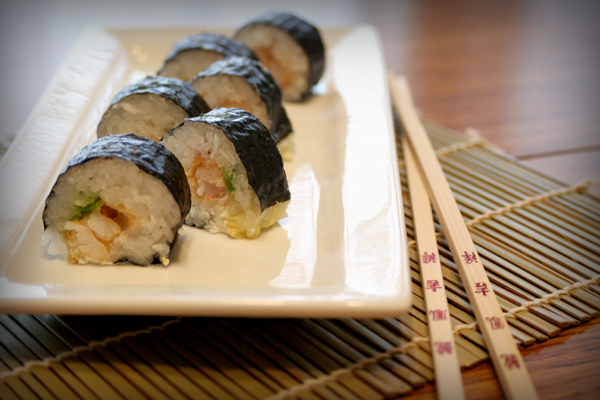
The other roll pictured above is a variation of a Dunwell Roll. It has deep-fried, breaded shrimp, jalapeño, and cream cheese. This roll has the Nori on the outside (so don’t flip over your rice-covered Nori this time, just place the ingredients on the rice), and typically includes a spicy sauce.

We skipped the spicy sauce this time, but if you want to make some its a simple combination of mayonnaise and chili paste. 4 parts mayo to 1 part chili paste.

Once you have the basics of rolling Sushi, you can really fill them as desired. Go crazy.

Bon Appetit!

Tags: , , , , , , , ,

Sushi 101: Sushi Rice

Sunday, April 5th, 2009

I’ve been hearing a lot about the idea of making Sushi from home. And it intrigued me. Some of the recipes I found seemed tedious and overwhelming… others seems pretty simple. What was pretty clear is that price tag of $10+ per rolls at a Sushi bar is a bit ridiculous. So I got thinking that it really can’t be that hard, and it has to be cheaper.

So, why not try. Right.

The verdict was that it was pretty easy. And pretty good.

Now, it should be mentioned that I am not completely convinced of the practice of using raw fish. Yes, I’m pretty much a sushi novice. But that’s the beauty of making it yourself, isn’t it. Complete discretion! You can put in whatever you’d like, in whatever quantities you’d like. And so it was.

Last week I invited some friends over and we gave it a try. I think we need a little practice rolling, but otherwise it went really well.

I suggest everyone try this. It was fun and easy.

Today, I’ll post the recipe for the Sushi Rice. This recipe is similar to may others I’ve seen online, so I can’t really give you a single source. But here it is!

Sushi Rice

2 cups short grain rice (or Sushi rice)
2 cups water
Rice cooker
1/2 cup seasoned rice vinegar
1/4 cup sugar
dash salt

Wash the rice until the water runs clear. About 5-7 times. This removes some of the starches from the outside.

Cook rice with the water in the rice cooker according to the directions on the cooker.

On the stove combine the vinegar, sugar and salt until well blended and warm. Do not boil.

Add the vinegar mixture to the rice. Stir.

Let sit 10 minutes, then stir again.

Cool to room temperature before using.

Note: You can cover the rice with a warm damp cloth to preserve moisture and temperature if you aren’t using it immediately.

This recipes yields rice sufficient for approx. 6 rolls.

Please follow the recipe precisely. You must use short grain rice – longer grained rice will not stick together as it should.
Also, please try to use a rice cooker. It will keep your rice from being too dry or too wet.

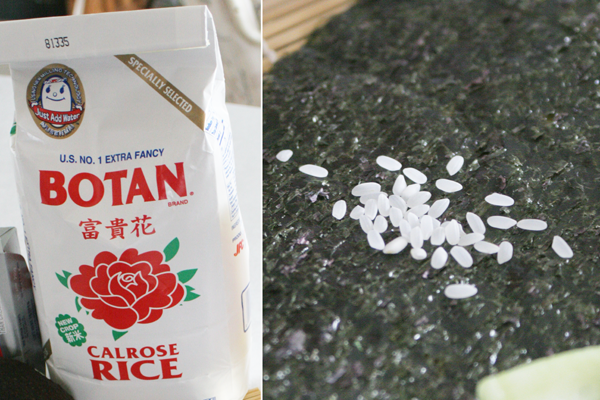
Here is an example of a short-grained rice you can use. Notice how small the grains are.

Finally, if you have access to an oriental market, go there, chances are you can get things much cheaper. In my case the rice vinegar was twice the price at the supermarket as it was at the oriental market.

Next up, the rolls themselves. Stay tuned.

Tags: ,